Docker and Oracle Database - A Love Story
Around a year ago I was in the 2nd year of my Bachelor’s Degree in Computer Science and Engineering, and I had to take a mandatory course on Database Management Systems.
The lab component of the course was centred around using Oracle 10g.
Since I have a recent-ish Macbook with an ARM based processor, installing Oracle 10g locally was kind of/sort of out of the question, and I ended up using Oracle LiveSQL for most of the course, and Oracle Mode on MariaDB (yay open-source!) for when I had to practice building applications with the Database using Java and the NetBeans IDE.
For those of my classmates who did manage to install Oracle, it was so hard to uninstall after they finished the course that I was honestly kind of glad I couldn’t install it, especially since it was a pretty heavy piece of software.
At the time, I didn’t know much about Docker, or about containers and virtualisation in general, so my attempts at installing Oracle DB onto my computer were limited to trying out various flavours and architectures of Linux/Windows using UTM and trying to install Oracle on the VMs I’d create. Almost always, the end result would be some QEMU (the emulator used by UTM) or Apple Virtualisation Framework error.
Once I learned more about Docker and how it worked, I circled back to trying to install Oracle DB onto my system - or at least trying and documenting the process for the sake of anyone else who might end up wasting countless hours fruitlessly emulating every flavour of Oracle Linux under the sun ;).
Why Docker? It’s simple, clean and neat! If you don’t need a permanant installation of Oracle DB, I genuinely think a Docker container might be the best way to get there.
I did manage to get Oracle installed using Docker, but haven’t tried connecting Java applications built with Netbeans yet. I think it should just work out though ;)
If you want to follow along exactly as I have, I have a Github Repository that you can clone that has most, if not all of the files/folders already made for you.
Prerequisites and A Quick Rundown of Funny Words
I’ll be assuming you’re working on an ARM based Mac system with Docker installed. You should be able to follow along on other architectures and operating systems as well - I’ll add notes where you might need to make some changes.
If you’re using the Homebrew package manager on a Mac, brew install --cask docker will do this for you.
If you’re on another OS/Architecture, just figure out how to get
Dockerand/orDocker Desktopinstalled.
What you’ve installed as docker is actually two pieces of software - Docker Desktop and the Docker Engine. As you might guess, the Docker Engine is what facilitates Docker’s core functions, while Docker Desktop gives you a neat and clean way to manage those core functions.
Docker allows you to create Docker Containers based on Docker Images built using Dockerfiles and optionally deployed using Docker Compose Files.
On MacOS, every Docker container can be interacted with as if it were a very lightweight virtual machine. The Docker Image of the container is essentially the entire filesystem of the machine, and the Dockerfile is a recipe that tells Docker how to generate said filesystem.
On Linux,
dockermakes use of a powerful kernel feature callednamespaces. I think it runs a tiny Linux VM to achieve similar goals on MacOS and Windows.
We’re going to use Docker to install the only version of OracleDB that supports ARM so far - Oracle 19c Enterprise Edition. I’m not sure why Oracle didn’t deem it important enough for them to provide ARM binaries for the other versions of Oracle, but I’ll take what I can get at this point.
We’ll mostly be following the instructions in this super helpful README file: Single Instance Oracle Databases | Oracle Docker Images - GitHub.
Building the Docker Image
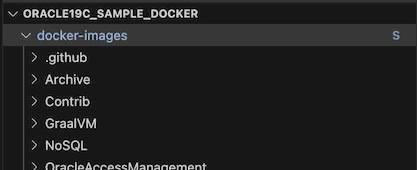
The first thing I’m going to do is make a directory where we’re going to do all our work in. Then, I’m going to clone the Oracle Docker Images Github Repository.
cd Projects # I have a Projects folder. You might not.
mkdir oracle19c_sample_docker
cd oracle19c_sample_docker
git clone https://github.com/oracle/docker-images.git
Now, the directory structure should look a little something like this:
Now, let’s proceed by downloading and copying over the Oracle Enterprise 19c binary into the docker-images/OracleDatabase/SingleInstance/dockerfiles/19.3.0 directory. You can visit the Oracle Software Downloads Page and search for the row titled “Oracle Database 19c for LINUX ARM (aarch64)”. The downloaded file is/should be named LINUX.ARM64_1919000_db_home.zip. You’ll have to create an account on Oracle.com
If you’re on another Architecture (most probably AMD64), get the ZIP file for Oracle 19c for Linux. It will probably be named something like
LINUX.AMD64_1919000_db_home.zipIn the commands detailed after this, replace any instance of ARM64 with AMD64 :)
Once the downloaded file is in the appropriate directory, we move into the appropriate dockerfiles directory and run the shell script buildContainerImage.sh that Oracle so helpfully provided:
mv ~/Downloads/LINUX.ARM64_1919000_db_home.zip 'docker-images/OracleDatabase/SingleInstance/dockerfiles/19.3.0/
cd 'docker-images/OracleDatabase/SingleInstance/dockerfiles/'
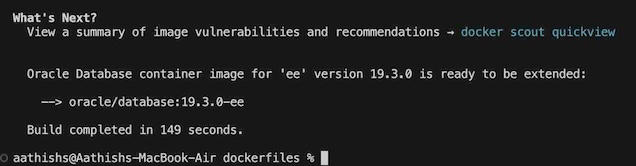
./buildContainerImage.sh -e -v 19.3.0
The -e switch is to tell the shell script that we want an image for the enterprise edition of OracleDB and the -v 19.3.0 is to tell the script that we want version 19.3.0.
Once the build has completed, you’ll see the following text on your terminal:
And when you check on the installed images on Docker Desktop, you should see something similar to this:
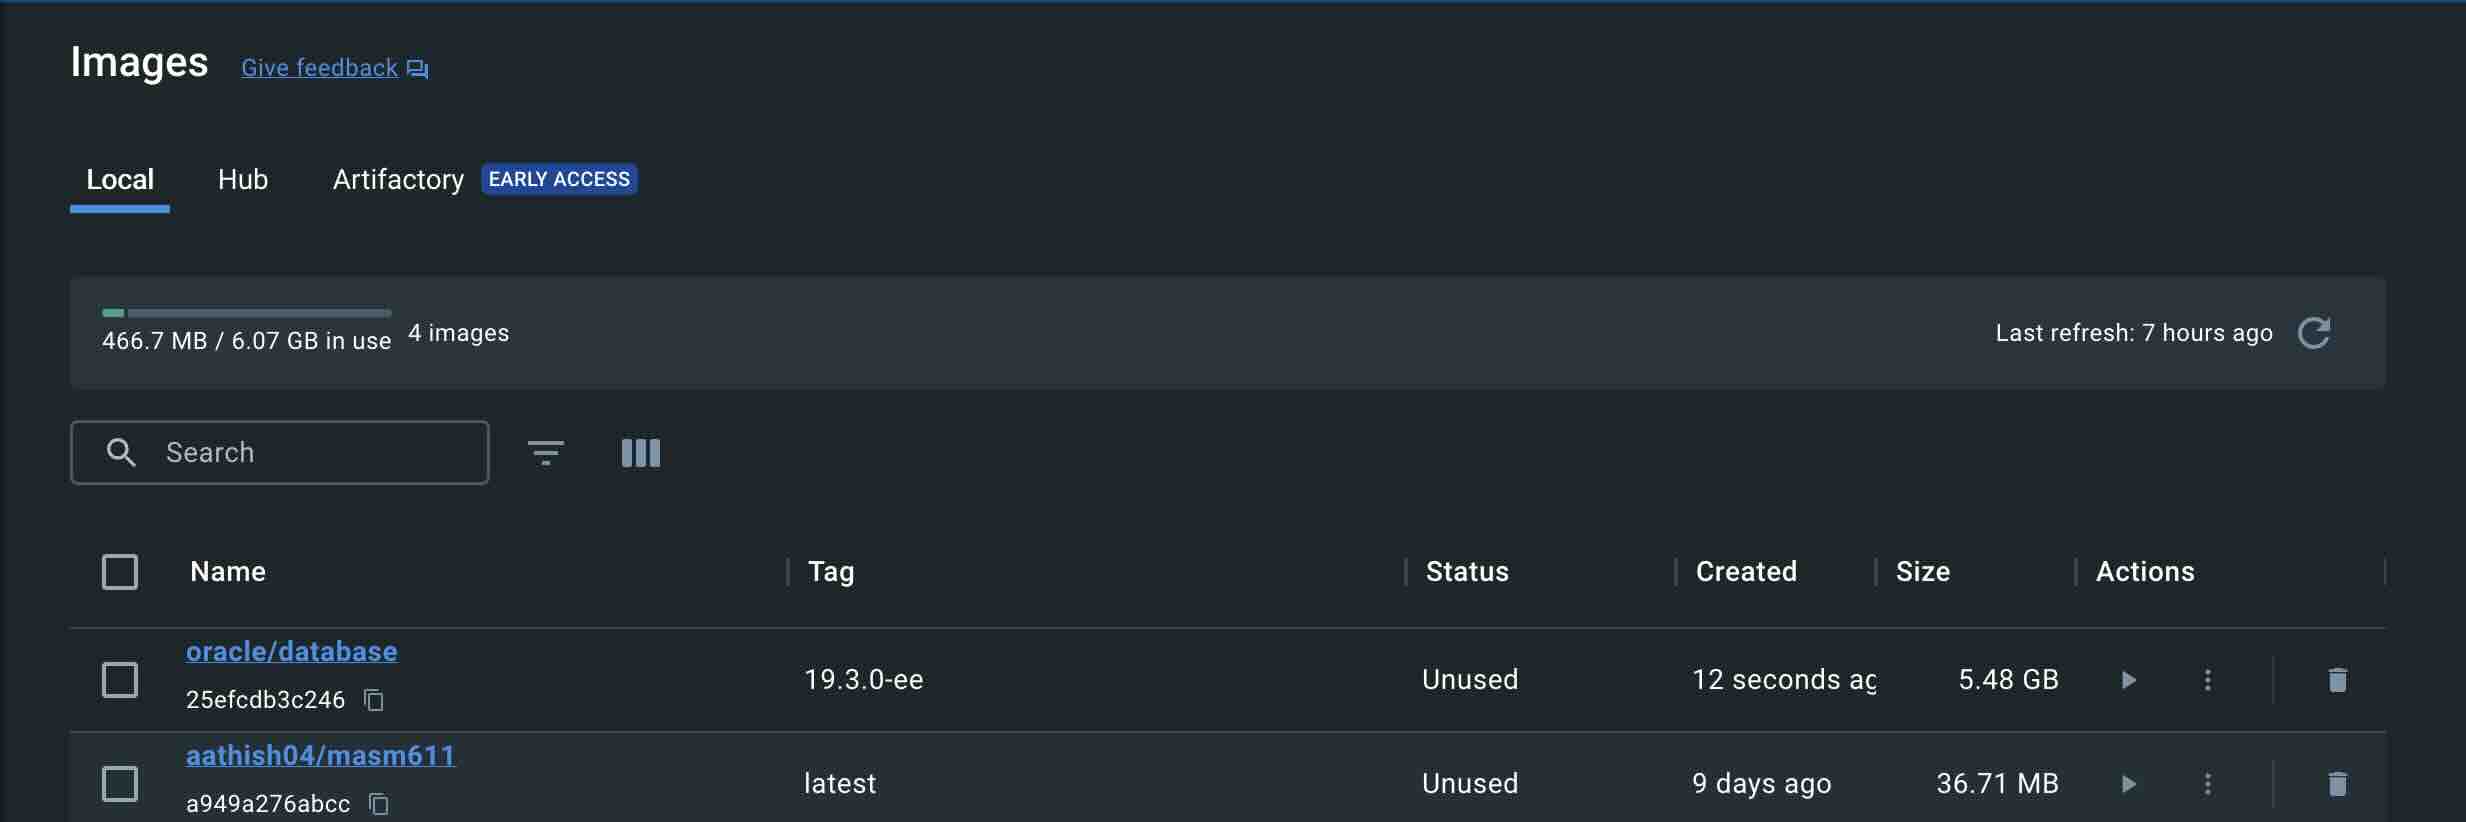
Note the, er, existence of the oracle/database image?
We can use this image to spin up an Oracle Database Docker Container!
Spinning Up Containers With Docker Compose
Now, the README file linked earlier shows how you can create a container using the docker run command. While it works just fine, I don’t really like the fact that using docker run generates a new container every time it gets run. It’s also a little tedious to add all the configuration options as command-line switches.
Here’s the full (un-filled) run command, in all it’s glory:
    docker run --name <container name> \
    -p <host port>:1521 -p <host port>:5500 -p <host port>:2484 \
    --ulimit nofile=1024:65536 --ulimit nproc=2047:16384 --ulimit stack=10485760:33554432 --ulimit memlock=3221225472 \
    -e ORACLE_SID=<your SID> \
    -e ORACLE_PDB=<your PDB name> \
    -e ORACLE_PWD=<your database passwords> \
    -e INIT_SGA_SIZE=<your database SGA memory in MB> \
    -e INIT_PGA_SIZE=<your database PGA memory in MB> \
    -e INIT_CPU_COUNT=<cpu_count init-parameter> \
    -e INIT_PROCESSES=<processes init-parameter> \
    -e ORACLE_EDITION=<your database edition> \
    -e ORACLE_CHARACTERSET=<your character set> \
    -e ENABLE_ARCHIVELOG=true \
    -e ENABLE_TCPS=true \
    -v [<host mount point>:]/opt/oracle/oradata \
    oracle/database:19.3.0-ee
I removed a few of the flags that really don’t matter, like the INIT_SGA_SIZE and INIT_CPU_COUNT, and put that command through this docker-run-to-compose converter, and pasted the resulting docker-compose YAML into a file named, well, docker-compose.yaml.
services:
  oracle19cee:
    container_name: oracle19cee
    environment:
      ORACLE_PWD: oracle
      ORACLE_SID: ORCL
      ORACLE_PDB: ORCLPDB
      ENABLE_TCPS: 'true'
      ORACLE_EDITION: enterprise
      ENABLE_ARCHIVELOG: 'true'
    image: oracle/database:19.3.0-ee
    ports:
    - 1521:1521
    - 5500:5500
    - 2484:2484
    - 8080:8080
    ulimits:
      nofile:
        soft: 1024
        hard: 65536
      nproc: 65535
    volumes:
    - ./oradata/:/opt/oracle/oradata
    - ./programs:/home/oracle/programs
I placed this file inside the oracle19c_sample_docker directory from before, and created two new folders oracle19c_sample_docker/oradata and oracle19c_sample_docker/programs. The former folder is for the container to store persistent database information, and the latter is to store my programs.
You might want to edit the ORACLE_PWD entry to match whatever password you want to set for the administrator of the database. I’m just using oracle since it’s easy to remember.
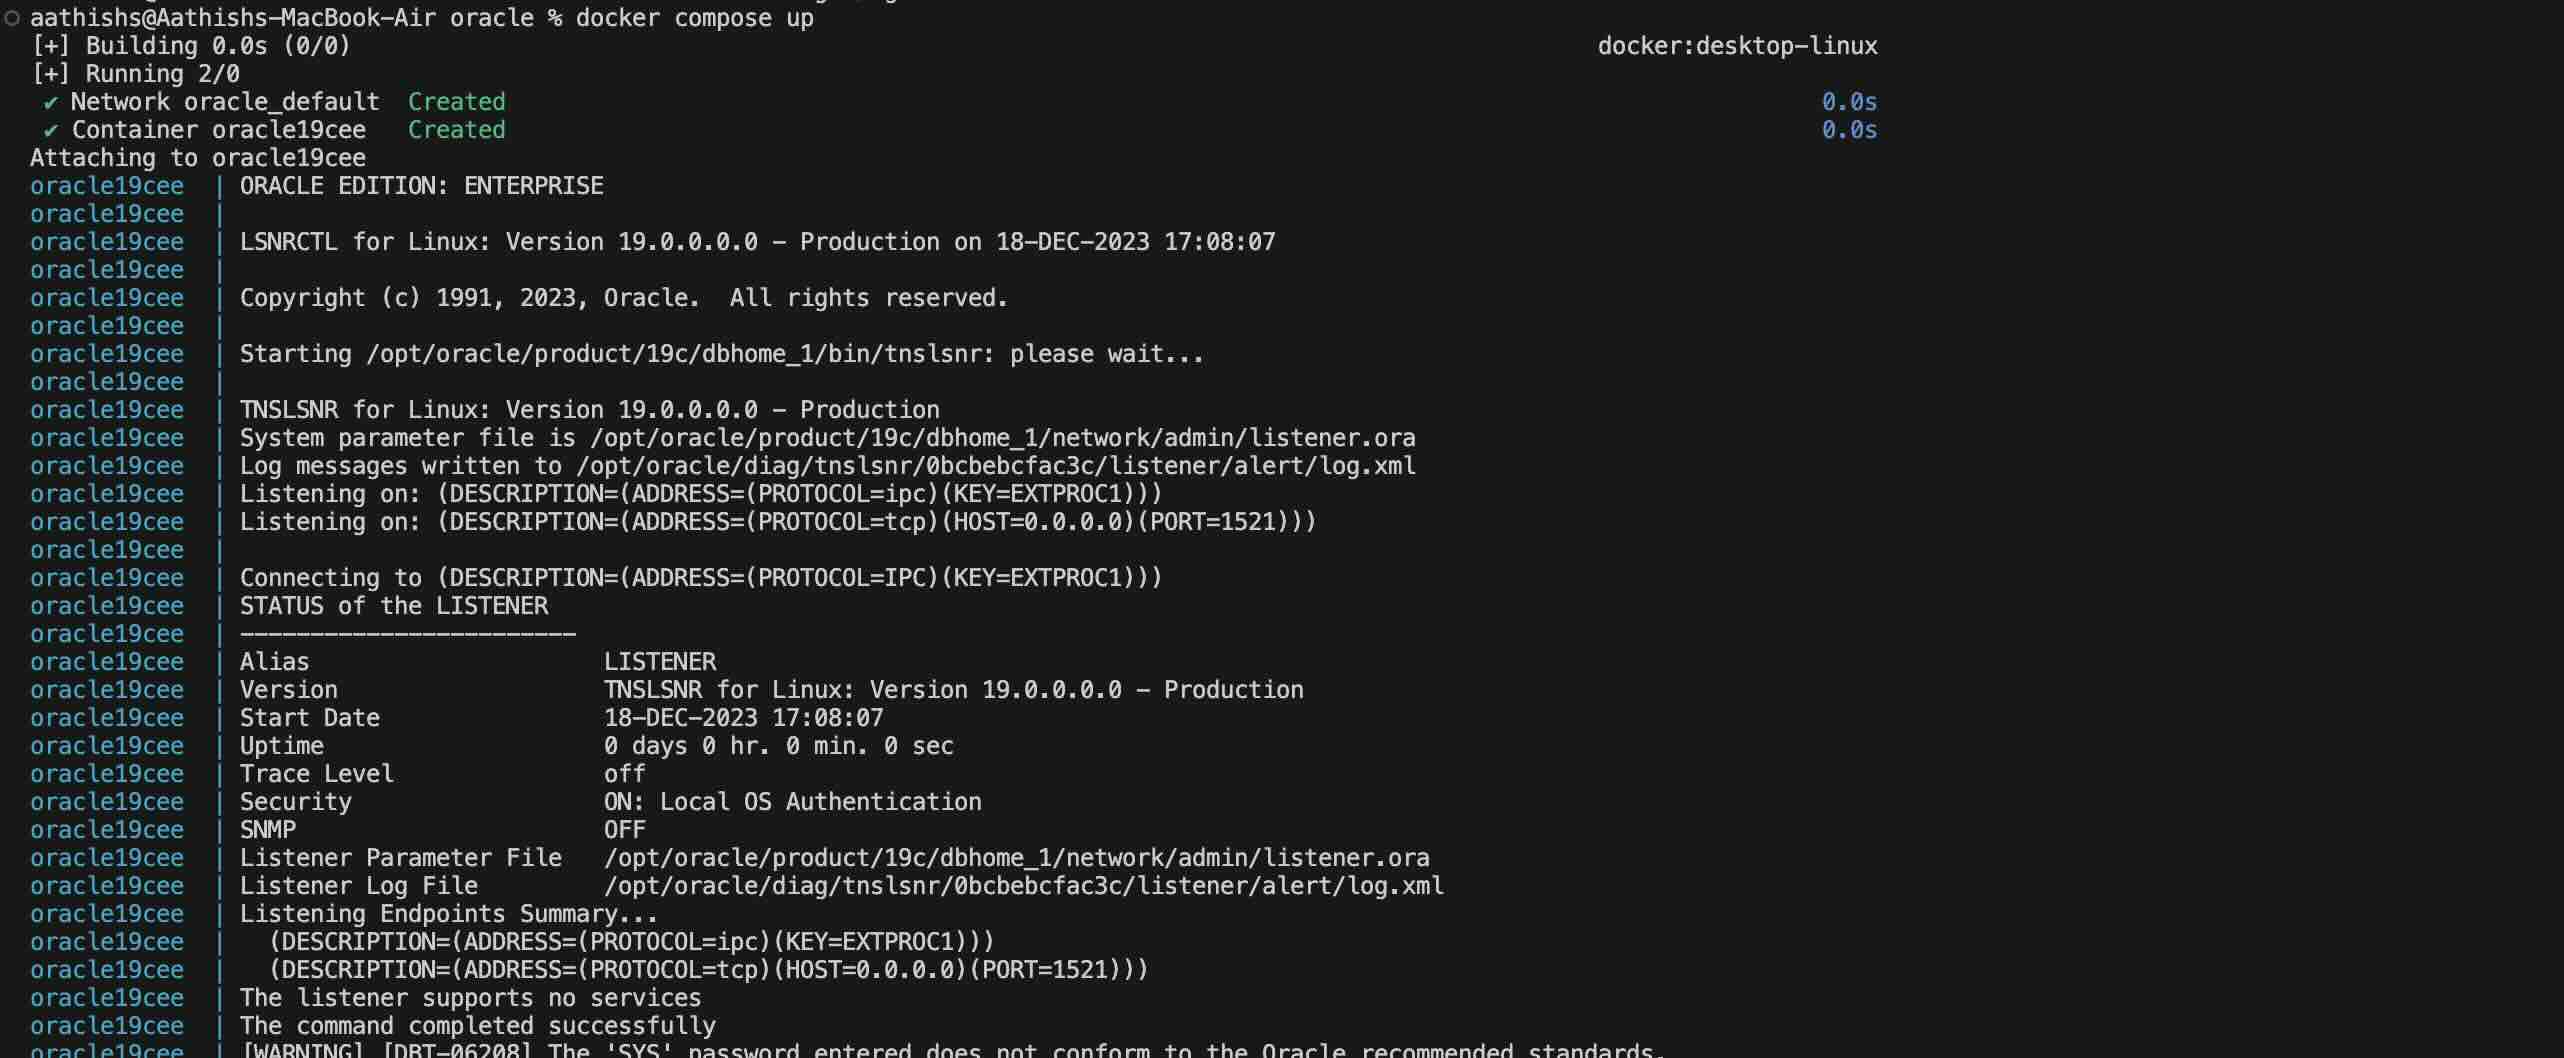
Then, I just run docker compose up, making sure that I’m in the oracle19c_sample_docker directory from before.
Connecting to the Database With SQLPlus
On the very first execution of the docker compose up command, the container will go through the motions of setting up the database, creating the administrator users, etc. This will take time, so get a snack or something. It took my computer around 5-6 minutes to crunch all the numbers.
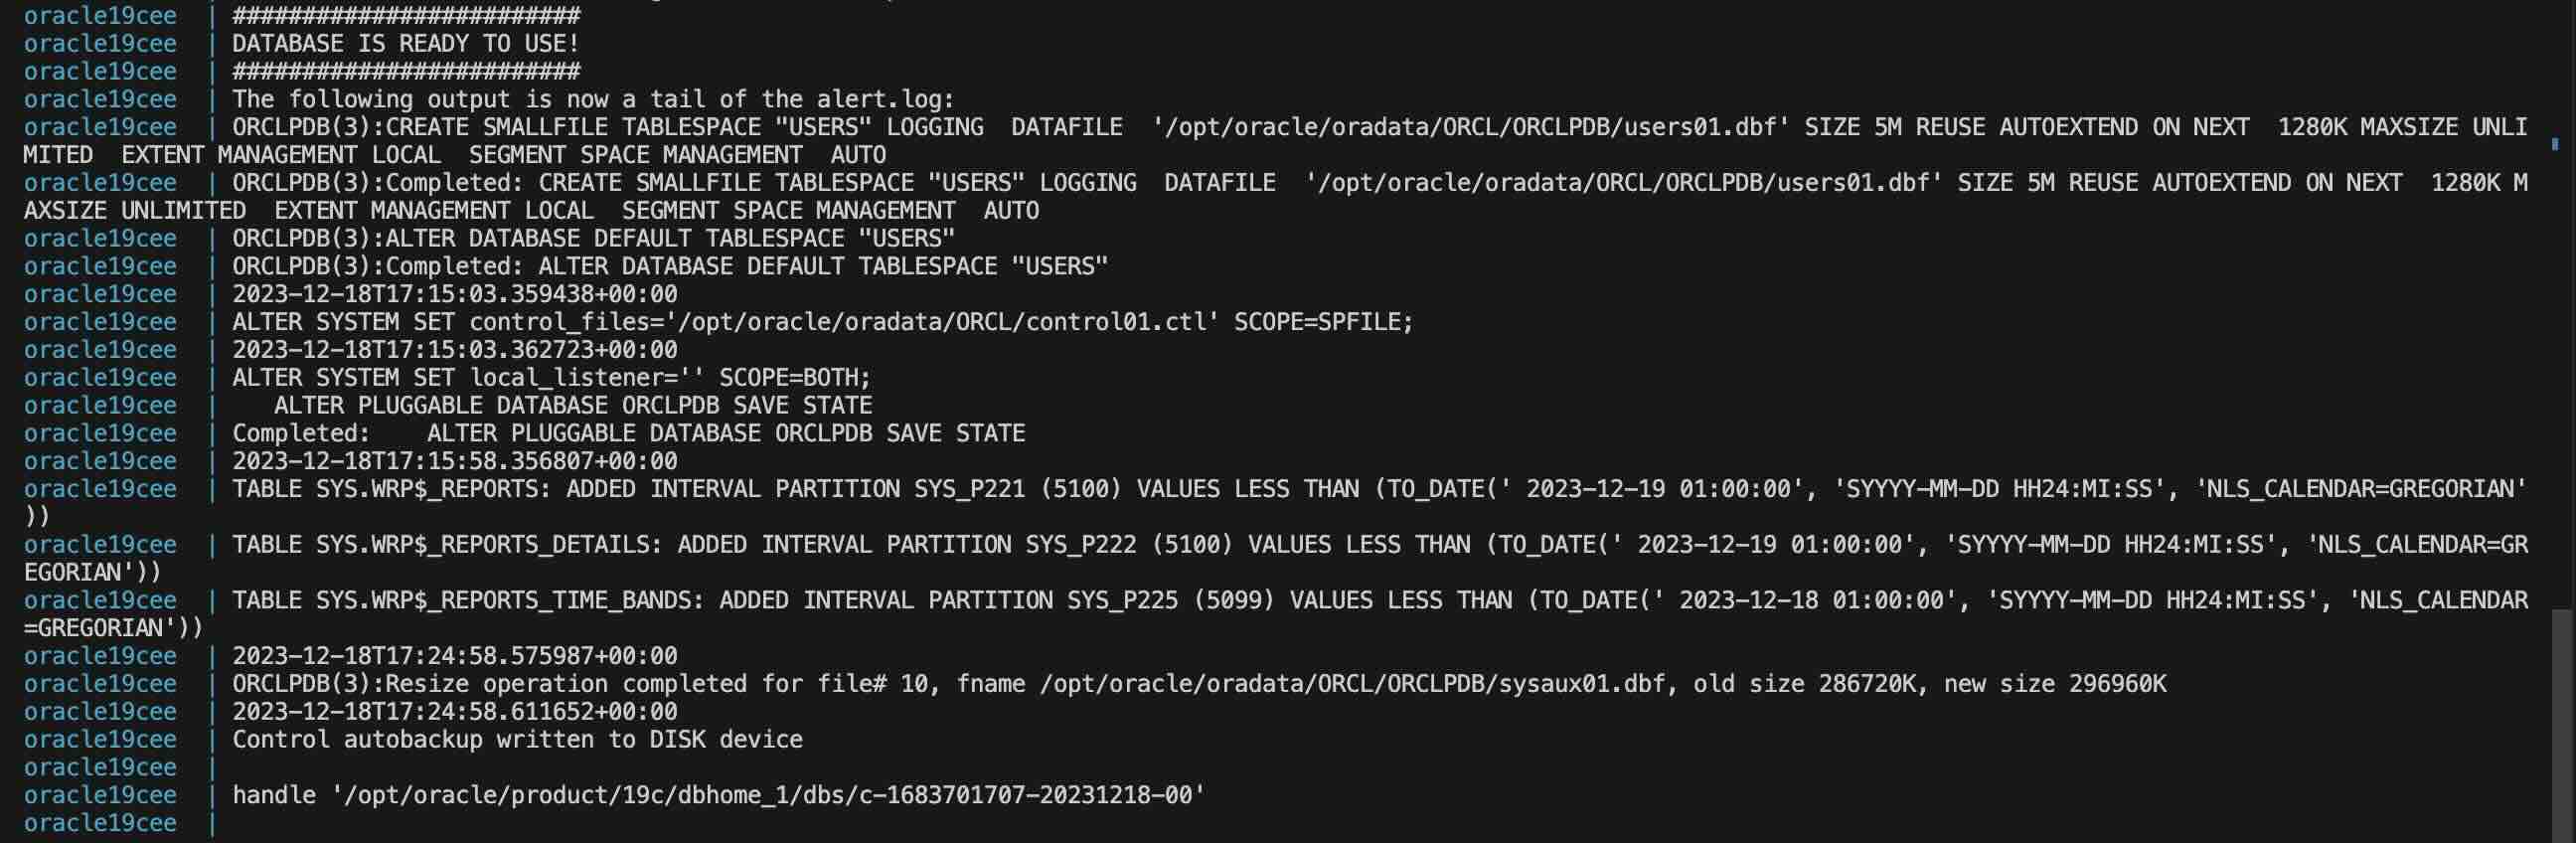
Near the end of the process, you’ll see, proud and clear, a message saying the database is ready to use:
Now, open up Docker Desktop, and go to the containers tab. You should see a tab with the name of the folder you placed the docker-compose.yaml file in. In my case, it’s called oracle19c_sample_docker.
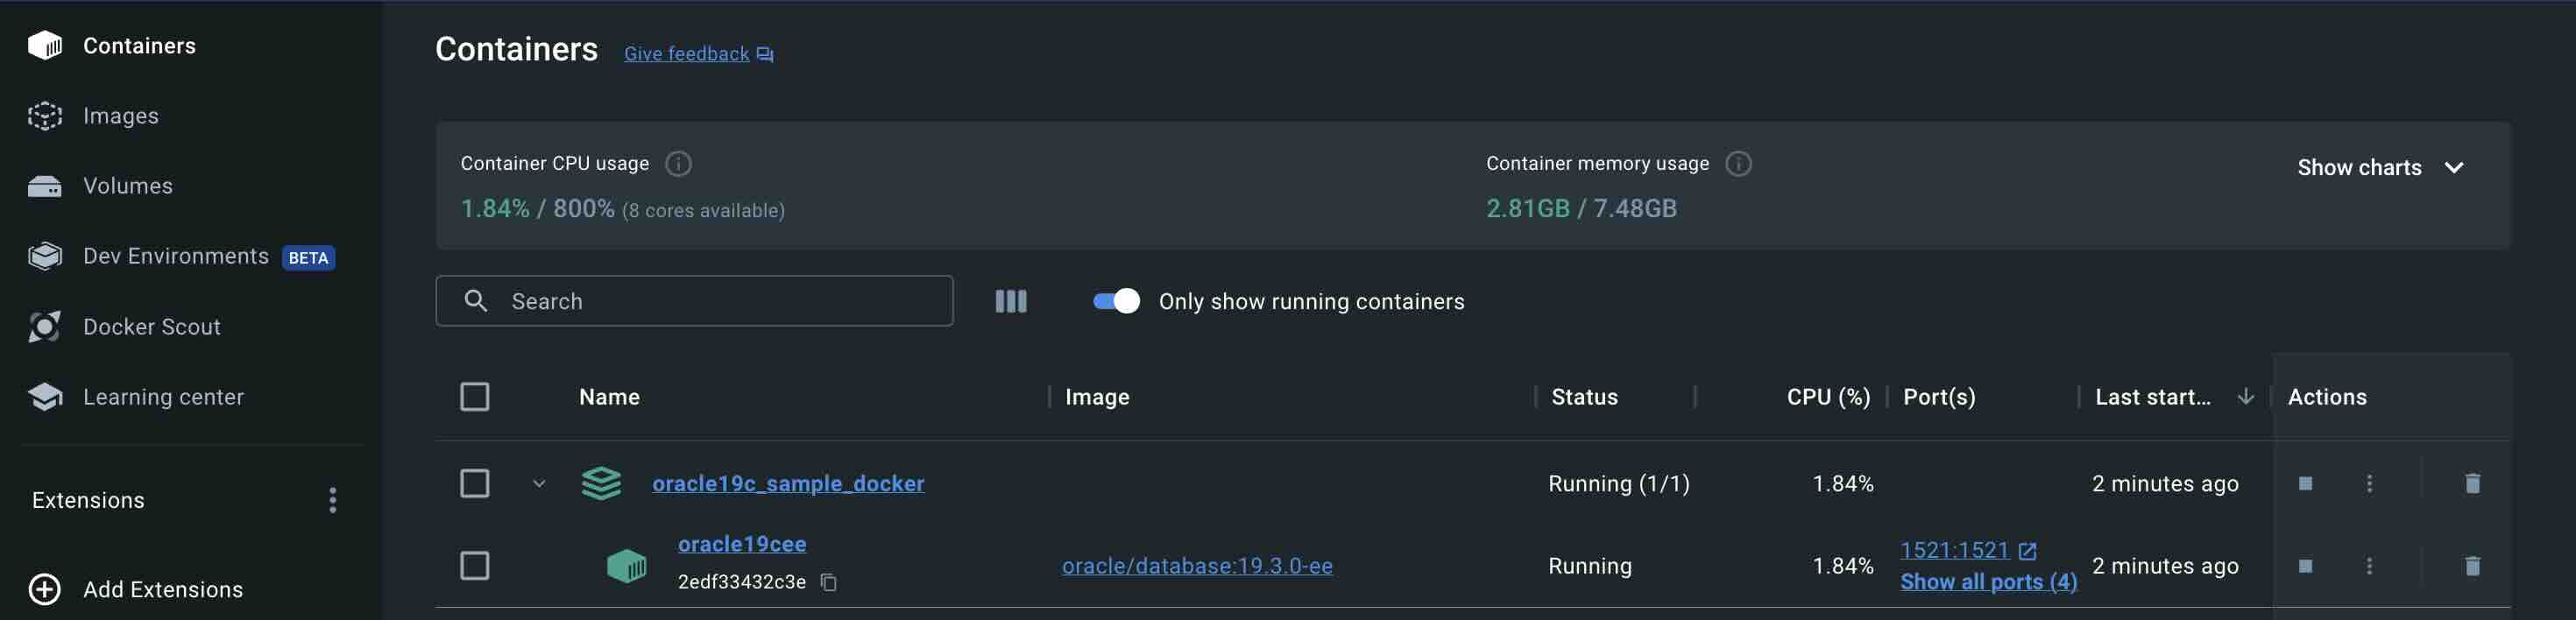
The sub-tab with the name oracle19cee is the actual Docker container where the Database is running.
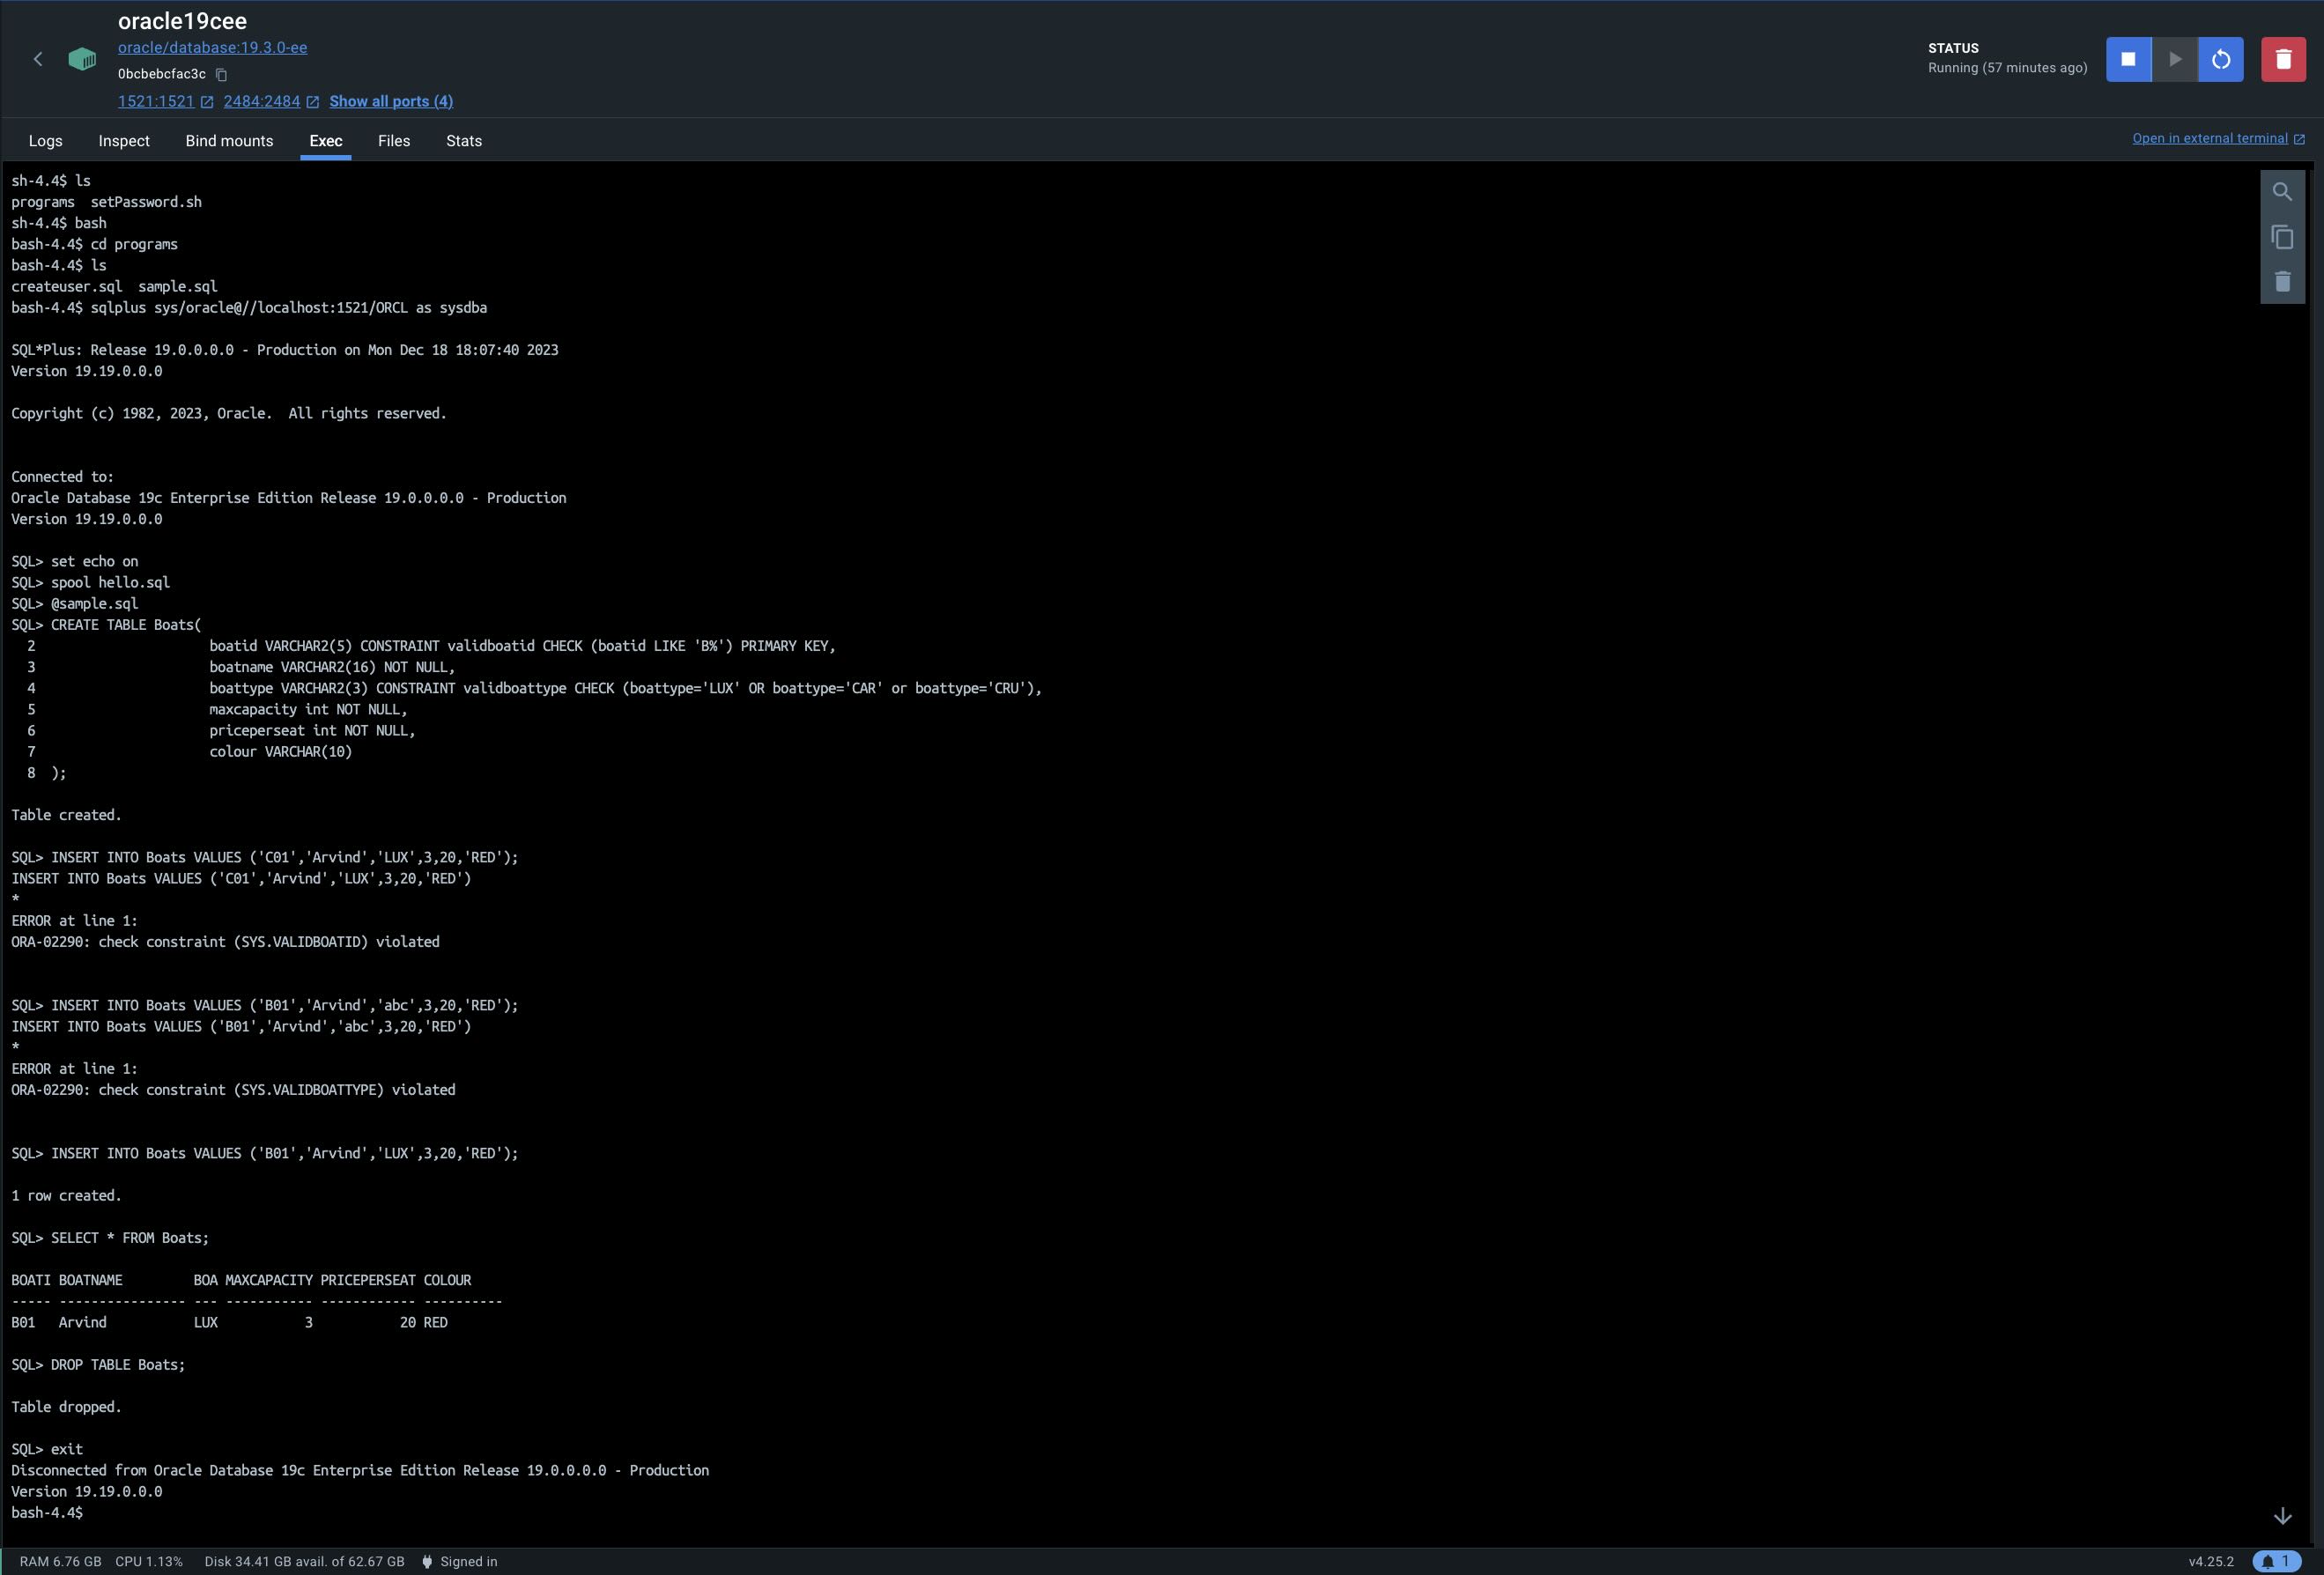
Click on it, and it should take you to a window with an overview of the container. Here, you should click on the exec tab, which will allow you to run shell/bash commands on the prompt.

Feel free to explore the container. Treat it like a super-sleek VM.
To run SQL commands, we’ll invoke the sqlplus command, with some extra parameters since we’ll be logging in as the system database adminstrator.
sqlplus sys/oracle@//localhost:1521/ORCL as sysdba
You’ll have to replace oracle with the ORACLE_PWD you set, and ORCL with the ORACLE_SID you set.
Once you’ve run that command, you’ll be dropped into SQLPlus, and you can enter SQL Commands as you please.
Everything from spool to PL/SQL should just work, though I haven’t tested out PL/SQL yet.
When you’re done, you can just stop the container gracefully by pressing the Stop button above the built-in terminal. The next time you want to run the Database, you can start it from the Docker Desktop, or simply navigate to the oracle19c_sample_docker (or whatever equivalent you created on your computer) folder, and run the docker compose up command again. Like before, you wait a couple of minutes for the database to start working, and then you can invoke sqlplus and be on your merry way.
Port 1521, which is where Oracle normally exposes database connections, is port-forwarded from the Docker container to the host machine. Effectively, this means that you can connect to localhost:1521 from your host machine (the Macbook, for example) and interact with the database that way as well.
That might be especially useful when, for example, you have to connect to the Database from a Java application built using NetBeans. I haven’t yet tested this myself, but in theory, it should just work.
Cleaning Up
One major advantage of Docker, and frankly one of the main reasons I started using it in the first place, is how simple post-use cleanup is.
Once you’ve made sure you’re all done with Oracle on your system, delete the oracle19c_sample_docker folder (or it’s local equivalent) from your computer. Make sure you have a backup of all your programs if you need them!
Next, go to the containers tab from before and click on the trash can on the same row as the docker container you want to get rid of. This’ll get rid of the database.
You can get rid of the Docker Image by doing something similar i.e visiting the Images tab and clicking on the trash can on the same row as the Docker Image for oracle/database.
So what’s the final word?
I struggled to install Oracle onto my laptop when I was studying for exams during the semester. No doubt I wasted a lot of time scurrying down rabbit holes and dead-ends when I should probably have just borrowed a friend’s laptop (which I ended up doing for some portion of the semester)!
I did learn quite a bit about Docker, Oracle, and Virtualisation while trying to get this all to work, and there’s no such thing as too much knowledge IMHO.
If you found the linked github repository for this project useful, please feel free to star it on Github. In the same vein, if you found this blog post useful, feel free to star its Github repository as well.